How To Assemble A Armor All Vacuum?
There are a few things you need in order to assemble your Armor All vacuum. You will need the vacuum itself, of course, as well as the hose and attachments. The first thing you need to do is connect the hose to the vacuum.
Then, you will need to attach the desired attachment to the end of the hose. Finally, you will need to plug the vacuum in and turn it on.
ARMOR ALL VACUUM TEST AND REVIEW
- Check that all parts are accounted for
- You should have the main vacuum body, a dustbin, a filter, and a crevice tool
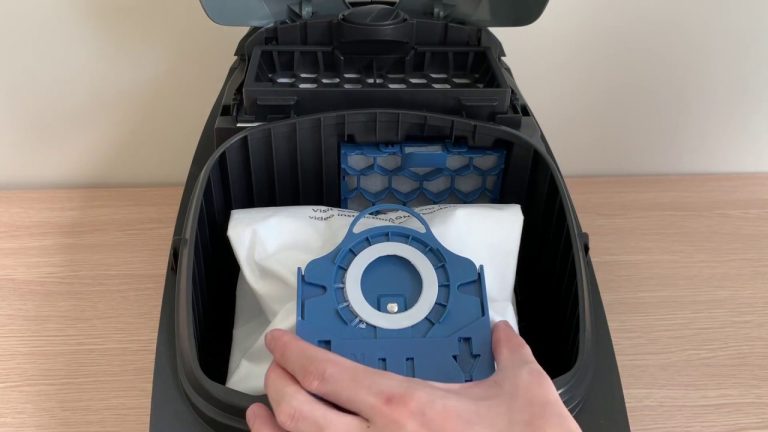
- Insert the filter into the main body of the vacuum
- Make sure that the filter is seated properly and that the arrows on the filter are pointing in the correct direction
- Attach the dustbin to the main body of the vacuum
- Again, make sure that it is properly seated and that the arrows are pointing in the correct direction
- Your vacuum is now ready to use! To start vacuum, simply press the power button on the main body of the unit
Armor all 2hp vacuum manual
If you’re looking for an Armor All 2hp Vacuum Manual, you’ve come to the right place. Here at eVacuumStore.com, we have a wide selection of manuals for all sorts of vacuum cleaners, including the Armor All 2hp. This powerful vacuum cleaner is perfect for those who have a lot of ground to cover, and it comes with a number of features that make it a great choice for any home.
The Armor All 2hp Vacuum Cleaner is a powerful machine that can handle any cleaning job. It has a 2 horsepower motor that provides plenty of suction power, and it comes with a number of attachments that make it perfect for any space. It also has a dustbin that can be easily emptied, and it comes with a warranty so you can be sure that it will last for years to come.
Armor all utility vac instructions
Assuming you would like a blog post on how to use the Armor All Utility Vac: The Armor All Utility Vac is a great tool to have around the house to quickly clean up small messes. Here are some tips on how to use it :
-To start, make sure the filter is properly in place.
-Then, add the appropriate amount of water to the tank.
-Next, plug in the vacuum and turn it on.
-Now, hold the vacuum close to the surface you wish to clean and move it back and forth until the area is clean.
-Once you are finished, turn off the vacuum and unplug it.
-Finally, empty the tank and rinse the filter.
Armor all utility vac replacement parts
If you’re looking for replacement parts for your Armor All Utility Vac, you’ve come to the right place. Here at Vacuum-Direct.com, we carry a wide selection of parts and accessories for this popular vacuum cleaner.
Whether you need a new filter, hose, or cord, we have what you’re looking for.
We also carry a variety of attachments, so you can customize your vacuum to suit your needs.
If you’re not sure which part you need, or if you have any other questions, our team of experts is here to help. Give us a call or send us an email, and we’ll be happy to assist you.
Armor all aa255 manual
If you’re like most people, you probably have a can of Armor All in your garage. It’s a staple for keeping your car’s interior looking new. But what exactly is Armor All and how do you use it?
Armor All is a synthetic polymer that creates a protective barrier on surfaces. It’s often used on car interiors to protect against UV damage and keep surfaces looking shiny and new.
To use Armor All, simply spray it on the desired surface and wipe it dry.
You don’t need to rub it in, just let it dry. Armor All can be used on dashboards, door panels, seats, and more.
Just be careful not to use too much, as it can make surfaces slippery.
And avoid using it on steering wheels, as it can make them too slippery to grip.
Other than that, Armor All is a great product for keeping your car’s interior looking like new.
Armor all 2.5 gallon wet/dry vacuum filter
If you’re looking for a great filter for your Armor All 2.5 gallon wet/dry vacuum, you’ve come to the right place. Here at Armor All, we know a thing or two about filters, and we’re here to help you choose the right one for your needs.
When it comes to choosing a filter for your vacuum, there are a few things you’ll want to keep in mind.
First, think about what you’ll be using your vacuum for. If you’re only going to be using it for light cleaning, then you won’t need a heavy-duty filter. However, if you’re planning on using your vacuum for tougher jobs, then you’ll want a stronger filter that can handle the dirt and debris.
Another thing to consider is the size of the filter. You’ll want to make sure that the filter you choose is the right size for your vacuum.
How do I assemble my Armor All vacuum
Assuming you are referring to the Armor All 2.5 Gallon, 2 Peak HP, Utility Wet/Dry Vacuum, model AA255: The first thing you’ll need to do is gather the materials you’ll need to assemble your vacuum. These include the vacuum body, motor unit, power cord, accessory storage bag, crevice tool, utility nozzle, and owner’s manual.
Once you have all of these items, you can begin assembly. The first step is to attach the motor unit to the vacuum body. To do this, line up the two holes on the motor unit with the two holes on the vacuum body.
Once they are lined up, insert the screws that are included in the hardware bag and tighten them until the motor unit is secure. Next, you’ll need to attach the power cord to the vacuum. To do this, insert the male end of the power cord into the female end of the vacuum body.
Conclusion
Assembling an Armor All vacuum is a straightforward process. Begin by identifying all parts and reviewing the instruction manual. Attach the hose to the vacuum body, ensuring a secure connection. Next, attach the appropriate nozzle or brush to the hose based on your cleaning needs. Ensure all components are firmly connected. Plug in the vacuum and perform a test run to confirm everything is functioning correctly.